close ad
 
Important WebAssist Announcement
open ad
View Menu

Web development tutorial

Getting Started with Framework Builder

Tutorial created by Ray Borduin, WebAssist

Categories: Data Bridge, Design Extender, Design, Dreamweaver, Javascript, PHP

rating

Framework Builder is a Dreamweaver extension designed to make web development easy for advanced developers. This tool allows a developer to easily apply code or content that they have created, to any PHP page using includes (known as plug-ins). Through the use of dynamic plug-ins, developers can reduce the need to create multiple pages that serve similar purposes, and can instead apply dynamic plug-ins that load based on certain criteria being met.

Framework Builder also includes a theming architecture which takes Dreamweaver templates to the next level and makes it faster and easier for you to update your site's design, or apply different designs to your site's based on dynamic criteria you set.

arrow downRequirements

You will need the following items before starting this tutorial:

  1. Framework Builder
  2. Dreamweaver CS3 or later
  3. Dreamweaver site defined
  4. PHP page open in Dreamweaver

arrow downWhat are plug-ins?

Framework Builder plug-ins are PHP pages that contain code or content that you want to insert to multiple pages. When you add a Framework Builder plug-in to your page, the code or content is maintained in the PHP plug-in file, and an include reference is added to the specified location on your page.

This makes reusing code and adding this content to other pages or sites much easier.

Before using Framework Builder to apply plug-ins, you will want to have those plug-ins (PHP pages with code or content) already saved within your Dreamweaver site.

arrow downApplying Static Plug-ins

With static plug-ins you add your plug-in to your page and set the trigger that determines when that plug-in displays or runs on your page.

  1. Place your cursor within your code or content wherever you wish the plug-in to be inserted.
  2. From the WebAssist menu, choose Framework > Plug-ins > Insert Plug-in.

  3. From the Trigger menu list, select when you want this plug-in to run/load.

    1. always: Will trigger the plug-in whenever the page loads.
    2. any form post: Any form posted to the current page that the server behavior is applied to will trigger the plug-in.
    3. current page submit: Any form submitted on the page will trigger the plug-in.


  4. Select the Plug-in Source browse option and browse to the plug-in file you have created.
  5. Select 'Use Plug-in Title for page title' if your plug-in contains a page title that you wish to be used for your page's Page Title, when the plug-in loads.
  6. Click OK to insert your plug-in.

arrow downApplying Dynamic Plug-ins

With dynamic plug-ins you can specify multiple plug-ins which will load only if certain criteria is met. This allows you to have conditional behavior that will load different plug-ins depending on different situations (i.e. type of user logged in).

  1. Place your cursor within your code or content wherever you wish the plug-in to be inserted.
  2. From the WebAssist menu, choose Framework > Plug-ins > Insert Dynamic Plug-in.

  3. In the Trigger Variable field enter the server-side variable, URL parameter, etc. to specify what the trigger will be based on for each plug-in.
    Use the value lightning bolt to specify a dynamic value. The graphic above is only an example of something you could enter into this field.
  4. Choose the Add option to add your first plug-in.
  5. With your plug-in selected in the table above, choose the Plug-in Source browse option and browse to the first plug-in you wish to use.
  6. In the Variable Value field, enter the value that will cause this plug-in to be triggered.
  7. Click Add to add your next plug-in and repeat the process of selecting the Plug-in Source and Variable Value.
    Do this for all the different plug-ins you wish to add for this instance.
  8. Select 'Use Plug-in Title for page title' if your plug-in contains a page title that you wish to be used for your page's Page Title, when the plug-in loads.
  9. Click OK to insert your dynamic plug-in.

arrow downCreating your Framework Theme

Framework Builder Themes take Dreamweaver templates to the next level by applying the same technology used with plug-ins to your page's design. With this technology, you will be able to update all the pages in your site faster and more efficiently.

The first step in using the Framework theme architecture is to create your Framework theme. This process involves converting your existing Dreamweaver template to utilize the Framework theme concept.
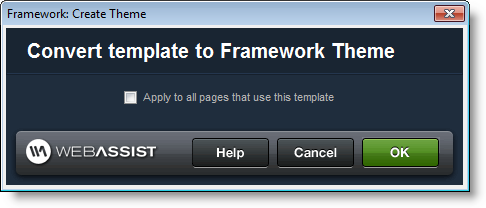
  1. With your Dreamweaver template open in Dreamweaver, choose WebAssist > Framework > Themes > Create Theme.

  2. In the Convert template to Framework theme dialog, choose the 'Apply to all pages that use this template" checkbox if you want the pages of your site that are based on this Dreamweaver template, to also be updated to use the Framework Theming architecture.
    In most situations, you will want to make this change so that you can leverage the Framework theme concept to update your site's design faster.

    When applying the Framework theming architecture to your pages, your pages will no longer display the Dreamweaver template elements in the Design View of Dreamweaver as they are now based on the plug-in concept. Instead your pages will appear blank except for the content that already existed within the editable regions.

  3. Click OK to convert your template to a Framework theme.
    When finished, a Themes folder will be added to your Templates directory and the Framework Builder theme file be created based on your Dreamweaver template.


When updating your site's design, continue making changes to your Dreamweaver template as you normally would. However, since the design elements are now loaded by plug-ins, changes to your Dreamweaver template are instantly updated on your site's pages, instead of you having to update all the pages. This saves you time with uploading changes to your site and making sure that every page gets updated.

arrow downDynamic Framework Themes

If you are a developer that creates many similar sites that need to look differently, or if you are creating a skinning engine where a site's design should change dynamically, Framework Builder's dynamic themes can be invaluable to your development.

As with the dynamic plug-ins, dynamic themes allow you to apply multiple Framework themes to your pages and have different themes load based on a trigger variable you specify.

  1. From the WebAssist menu, choose Framework >Themes > Apply Dynamic Theme.

  2. In the Trigger Variable field enter the server-side variable, URL parameter, etc. to specify what the trigger will be based on for each theme.
    Use the value lightning bolt to specify a dynamic value. The graphic above is only an example of something you could enter into this field.
  3. Choose the Add option to add your first theme.
  4. With your theme selected in the table above, choose the Theme Template select list and choose the template you wish to apply.
    All templates that share an editable region with the page currently open in Dreamweaver will be available.
  5. In the Variable Value field, enter the value that will cause this theme to be triggered.
  6. Click Add to add your next theme and repeat the process of selecting the Theme Template and Variable Value.
    Do this for all the different themes you wish to add for this instance.
  7. Select 'Apply to all pages that use this template' to have the framework architecture applied to all the pages in your site that are currently based on the templates you have selected.
  8. Click OK to insert your dynamic theme.

arrow downReviews and comments

Comments will be sent to the author of this tutorial and may not be answered immediately. For general help from WebAssist, please visit technical support.

Sign in to add comments
rating

Warrio: 10 Years, 3 Months, 3 Weeks, 3 Days, 15 Hours, 23 Minutes ago

Hi I've started playing around with this, I'm confused about the recordset bindings. In the DW template I'd have recordsets that were common to the site.
When I created a new page from a template, the bindings for the recordset would be available.

I've created a page from a converted template, however on the new page, there are no recordset bindings available to me

What am I missing here

Cheers

Jason Byrnes: 10 Years, 3 Months, 3 Weeks, 2 Days, 19 Hours, 56 Minutes ago

Using a theme creates a separation between the template and pages that use the template design.

The recordset on the template will not be visible to the pages that use the template.

Instead of adding the recordset to the template, you should create a plugin page that contains the recordset and bindings you want to include on the site pages, and add it to the pages using the Plugin behavior.


Build websites with a little help from your friends

Your friends over here at WebAssist! These Dreamweaver extensions will assist you in building unlimited, custom websites.

Build websites from already-built web applications

These out-of-the-box solutions provide you proven, tested applications that can be up and running now.  Build a store, a gallery, or a web-based email solution.

Want your website pre-built and hosted?

Close Windowclose

Rate your experience or provide feedback on this page

Account or customer service questions?
Please user our contact form.

Need technical support?
Please visit support to ask a question

Content

rating

Layout

rating

Ease of use

rating

security code refresh image

We do not respond to comments submitted from this page directly, but we do read and analyze any feedback and will use it to help make your experience better in the future.